
.

Tuesday, 22 January 2013
Follow me on Pinterest
I love Pinterest. What's Pinterest? It's a social media site where you can pin photos and websites that you want to share with other people. One of my 'boards' on Pinterest is Recipes. If I am searching the web for recipes and I find one I like I will click the little 'Pin It' bookmarlet button in my Bookmarks Bar and it will save the photo and link to my Pinterest Recipes board. It takes seconds and is a good way to index your favourite things and share them with others.

Monday, 21 January 2013


Sunday, 20 January 2013
Fitbit - personal trainer

Last year I bought a Fitbit Ultra from Apple Store Australia.
This nifty little device tracks how many steps you take and wirelessly transmits it from a base to your online Fitbit account. I used my Fitbit a lot last year when travelling to Sydney, Hobart, Brisbane, New Caledonia, Vanuatu and Fiji. Then when I got back it got lost in the bottom of my backpack and forgotten about.
Today I found it when looking for items to put into a care package for a friend who is in the Sydney Childrens Hospital in Randwick, Sydney.
Read more about Chloe and her struggle with Anorexia go here. So far the care package includes an Apple iPad, wireless keyboard, Digital camera to iPad adapter, DriSuit waterproof scuba suit for her new iPhone I gave her for Christmas. I know how hard it is to live in a hospital for months, having an operation on my feet at age 9-10. Anything to distract you and help keep your spirits up is a godsend.
But I digress... I became excited and connected my Fitbit Ultra device to my computer

I then logged in to the fitbit.com website to 'Track My Food on Fitbit'.

Below is my results for today. If I had forgone the glasses of Dolce Rosso my calorie count would have been half of the total. Eek! Looks like I need to avoid the alcohol to lose the kilos and get back into a size 16! That's my goal. Size 16 and then Size 14. And to remember to count calories - something I am definitely not used to!

Tastings: Melrose Almond with Chia Spread
Upon hearing that I had to give up Peanuts and especially Peanut Butter, I spent some time perusing the aisles of my local Healthy Life store and stumbled upon what would soon be my favourite spread.

The most alkaline of all nuts, almond spread is a good alternative to peanut butter. Rich in Vitamin E - a fat-soluble vitamin and antioxidant.
Chia is natures complete superfood. One of the highest plant based source of Omega 3, dietary fibre and protein.
I enjoy it on my toast or on rice and corn crackers.
Disclaimer: I was not paid to promote this product
Recipe: Pretty in Pink Cheesecake

Frozen Pink Cheesecake
Crust:
300 g (2 cups) almonds
10-12 fresh dates, pitted
2 tbsp coconut oil
a pinch of salt
Filling:
2 cups fresh (or frozen) raspberries & strawberries
juice from 1/2 lemon
1/2 cup honey
1 cup mascarpone cheese
1 cup quark or curd (you could probably also replace it with a fat Greek or Turkish yogurt)
Topping:
1 cup fresh summer fruit and a couple of edible flowers
Grind almonds in a blender or a food processor for about a minute. Add dates, coconut oil and salt and run the processor until it all comes together. Flatten it out on the bottom of an 8-inch non-stick spring form. Store in the fridge while you make the filling.
Blend berries, lemon juice and honey. Stir together mascarpone, curd and the blended berries in a large bowl. Pour it on top of the crust in the spring pan and put it in the freezer for 1-2 hours (you can keep it in the freezer for days but then you have to let it soften a bit before you serve it) .
Top the cake with fresh fruit and a couple of flowers. Serve immediately.
Recipe and photo by Green Kitchen Stories
URL: http://www.greenkitchenstories.com/frozen-pink-cheesecake/
Review: Sweet treats at Thanon Khao San, Haymarket Thai restaurant
( Re-posted from my Illawarra Gluten-Free blog )

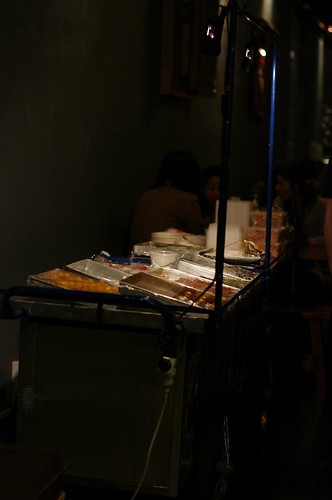
After indulging at the Sydney Night Noodle Markets in Hyde Park (part of the Crave Sydney) my husband and I were walking past a Thai restaurant in Pitt Street, Haymarket and spotted this cute Thai taxi and a selection of Thai desserts in a cold bar.
Intrigued, I stepped closer and asked the patient waitress what each dessert was called and what the ingredients were. Most of the desserts contained coconut cream, pandan or rice and were very tasty.
There were a few that I found a bit difficult to wrap my head around, including one which featured fried onion as a garnish. I will be sure to try it again next time I am feeling bold and daring a new taste sensation. I am sure that given time I would acquire the taste for a savoury onion dessert.

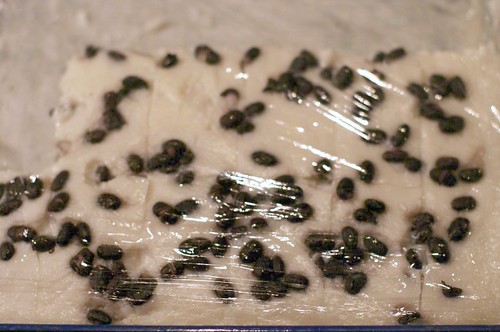
There was one dessert which I was told is very easy to make and it was the tastiest. Sticky Rice with Coconut Cream and Black Beans. It's a little bit like Rice Cream we ate as kids but more grown up and garnished with Black Beans - a staple in Thai and Vietnamese desserts. The first time I had tried this I was living on Campus at the University of Wollongong and sharing an apartment unit with a girl from Thailand, Taiwan, Canada and from Sydney. Patra Larpkatipanich (also known as 'Tip') would cook Sweet Sticky Rice for us and it was a great budget dessert for starving students with a sweet tooth :)
Read the recipe here


413 Pitt St Map
Haymarket NSW 2000
(02) 9211 1194
Links:
Thanon Khao San Thai Restaurant
http://www.thanonkhaosan.com.au/

Intrigued, I stepped closer and asked the patient waitress what each dessert was called and what the ingredients were. Most of the desserts contained coconut cream, pandan or rice and were very tasty.
There were a few that I found a bit difficult to wrap my head around, including one which featured fried onion as a garnish. I will be sure to try it again next time I am feeling bold and daring a new taste sensation. I am sure that given time I would acquire the taste for a savoury onion dessert.
There was one dessert which I was told is very easy to make and it was the tastiest. Sticky Rice with Coconut Cream and Black Beans. It's a little bit like Rice Cream we ate as kids but more grown up and garnished with Black Beans - a staple in Thai and Vietnamese desserts. The first time I had tried this I was living on Campus at the University of Wollongong and sharing an apartment unit with a girl from Thailand, Taiwan, Canada and from Sydney. Patra Larpkatipanich (also known as 'Tip') would cook Sweet Sticky Rice for us and it was a great budget dessert for starving students with a sweet tooth :)
Read the recipe here

Thanon Khao San
413 Pitt St Map
Haymarket NSW 2000
(02) 9211 1194
Links:
Thanon Khao San Thai Restaurant
http://www.thanonkhaosan.com.au/
Tani Kitchen Dessert - Sticky Rice with Coconut Cream
http://tankitchen-dessert.blogspot.com/2009/02/sweet-sticky-rice-with-coconut-cream.html
http://tankitchen-dessert.blogspot.com/2009/02/sweet-sticky-rice-with-coconut-cream.html
Recipe: Coconut Chocolate Mousse

1/2 cup Coconut Cream
75 g dark chocolate pieces
½ vanilla pod, seeds only
2 tsp caster sugar
Strips of orange zest to decorate
1. Melt the chocolate in a heatproof bowl over a pan of simmering water, Allow to cool.
2. Whisk up the coconut cream in a large bowl then carefully fold in vanilla, sugar and chocolate into the cream until mixed.
3. Pipe into glasses and serve chilled.
Recipe: Gluten-free hamburger buns
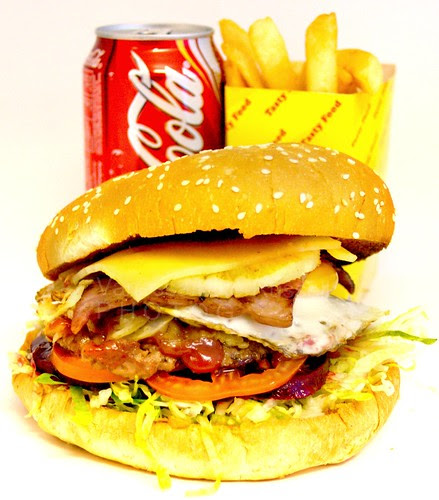
If there is one thing that I have really missed since switching to a gluten-free diet it is a tasty Australian hamburger with the lot. It's not like I ate them every day, week or month - but when the craving hits there is just nothing like the combination of bacon, beetroot, onions and sauce - magic.
I have to confess that last month I broke down and bought a hamburger at McDonalds Warilla. It was on a day filled with medical appointments and I just caved. I knew what the gluten in the bun would do to me but my restraint had just disappeared. I was riding past the sign for McDonalds when headed to the car park of Warilla Library when I found myself headed into McDonalds instead. Despite the fact I knew what previous visits had triggered (stomach cramps, bloating, irritable bowel, discomfort, brain fog etc) I just couldn't help myself. Sadly the hamburger was very disappointing and I was wishing that it had been a tasty hamburger with the lot.
As I look at the photo I took of the Hamburger with the Lot from Metzi's Tasty Takeaways it prompted me to make a challenge to all takeaway operators in the Illawarra and readers of this blog
MAKE YOUR OWN GLUTEN-FREE HAMBURGER!
I have found a number of recipes online and online stockists of gluten-free burger buns.

About.com - Gluten Free Burger Bun
Gluten Free bun featuring white rice flour, potato starch, tapioca starch and amaranth flour
http://glutenfreecooking.about.com/od/glutenfreebreads/r/gfburgerbun.htm

Gluten Free Girl - Gluten-Free burger bun recipe
Includes almond and rice flour as well as a pre-bought flour mix
http://glutenfreegirl.com/gluten-free-hamburger-buns/
And for those that don't have the time, I can recommend SimplyWize Crusty Bread mix


Simply Wize Gluten-Free Crusty Bread
Open the box, make up the mixture and bake some of the tastiest crusty burger buns you can imagine.
Simply Wize has a growing range of gluten-free products to choose from. Ask your local supermarket, health food store or retailer to order some in today.
I have been fortunate to sample many of their products and look forward to trying them all.
Momentum Foods - Simply Wize
http://www.momentumfoods.com.au/products.html
And after much searching I have found hamburger buns pre-made which could be frozen and kept on hand in home or at a cafe
 SOL Gluten Free Hamburger Rolls - pack of 4
SOL Breads Gluten Free bread is famous for both taste and the added health benefits. Our gluten free bread is not only gluten free, but also free from yeast, dairy, soy, additives and emulsifiers.

"A great tasting gluten free loaf that Coeliac sufferers just can't stop talking about. Free of wheat and gluten but still providing an excellent source of Omega 3 without the use of animal fats and preservatives."
Only $5 for a pack of 4 rolls
Do you know of a takeaway or restaurant that offers gluten free hamburgers? Let us know!
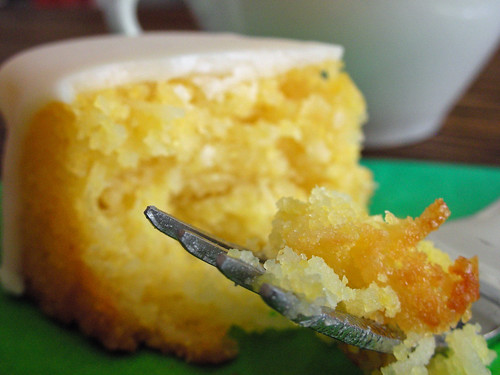
Recipe: Gluten-free Strawberry Cake

Image courtesy of glutenfreemommy.com
Note: You can easily substitute 3 cups of your gluten free flour mix for mine- just watch the liquid content.
1/2 cup almond meal
1 1/2 cups brown rice flour
3/4 cup tapioca flour
1/4 cup sweet rice flour
2 1/2 teaspoons baking powder
1/2 teaspoon salt
2 Tablespoons strawberry Jello® mix
1 1/2 teaspoons xanthan gum
2/3 cup unsalted butter, softened
3/4 cup granulated sugar
1/2 cup powdered sugar
1/2 cup brown sugar
3 large eggs
1 teaspoon vanilla
1 cup pureed strawberries
3/4 cup milk (or until consistency of cake batter)
FROSTING:
2 packages of cream cheese, softened
1 stick of butter, softened
3 cups or more of powdered sugar
1 teaspoon vanilla
squeeze of lemon juice
DIRECTIONS FOR CAKE:
Preheat oven to 350 degrees. Grease two 8 inch cake pans. In a med. mixing bowl, whisk together the dry ingredients including the Jello® . In your stand mixer, cream together the butter and the sugar until light and fluffy. Add eggs one at a time. Add vanilla. Alternate adding the flour mixture and the strawberry mixture. Slowly pour in milk a little at a time until the cake reaches cake batter consistency- about 3/4 cup. Pour batter into prepared pans. Bake cakes for 30-40 minutes or until the cake tester comes out clean. Remove the pans from the oven and allow them to cool for 5 minutes in the pan. Invert on to cooling rack. Cool cakes completely before icing.
DIRECTIONS FOR FROSTING:
In your stand mixer, combine cream cheese and butter until smooth. Add vanilla. Slowly add the powdered sugar until desired consistency. Squeeze in just a little squeeze of lemon juice.
Recipe and photography by glutenfreemommy.com
Recipe: Marzipan

Another recipe with almonds is marzipan. If you've ever watched Cake Boss or Ace of Cakes you would know some of the amazing cakes and decorations formed out of marzipan. I found a medieval recipe for marzipan that I have added to my files and thought to share with you. Gluten free and a great addition to your desserts platter for special events.
The Commonplace Boke of Lady Avelyn Grene - Marzipan
* 1/2 lb blanched almonds, ground*
* 1/4 lb sugar**
* 1 Tbsp Rosewater
* 1 Tbsp water
Mix Ingredients for marzipan together. Marzipan should resmeble a dough - you should be able to mold it a bit.
*Using a food processor to grind the almonds is recommended. Also, the finer the grind, the more smooth the marzipan. Grinding the almonds to the size of sand granules works well. Be sure to not grind them to almond flour."
Marzipan is a confection consisting primarily of sugar and almond meal. Some marzipan is flavored with rosewater. Persipan is a similar, yet less expensive product, for which the almonds are replaced by apricot or peach kernels. In Goa (formerly Portuguese India) almonds are replaced by cashews. Many confectionery products sold as marzipan are made from less expensive materials, such as Soy paste and almond essence. (Source: Wikipedia)
Definition: Marzipan Wikipedia URL: http://en.wikipedia.org/wiki/Marzipan
Image: http://www.jepska.com.au/products/about_marzipan.htm
Recipe: Homemade Pumpkin Gnocchi
I made this recipe and it was absolutely delicious!

Homemade Pumpkin Gnocchi
from Gluten Free Italian Cookbook
by P. Rigoli & E. Nicolaci
1. Place potatoes in a saucepan of salted water, cover and bring to the boil. Reduce heat and simmer covered until cooked when tested.
2. Drain potatoes, peel and place in a large bowl, mash until smooth.
3. Add grated pumpkin and eggs to potatoes and mix thoroughly.
4. Add flour to mixture a little at a time and work with hands until dough consistency
5. Dust bench with extra flour, turn pumpkin mixture out and gently knead until smooth
6. Roll into large sausage shape and divide into 8 pieces.
7. Dust bench again and roll out each piece approx 1cm diameter and cut into 2cm lengths.
8. Roll pieces on gnocchi board (or gently press over the back of a fork)
9. Cook gnocchi in rapidly boiling salted water with a splash of olive oil.
10. Once gnocchi floats to the top of the saucepan, cook further one minute, drain and serve immediately with your favourite sauce. Enjoy!
Note: You could substitute sweet potato for the potato to make it even more healthy.

Homemade Pumpkin Gnocchi
from Gluten Free Italian Cookbook
by P. Rigoli & E. Nicolaci
- 1kg Sebago potatoes
- 400g pumpkin, finely grated
- 2 eggs
- 400g White Wings GF Flour
- Extra White Wings GF Flour for dusting
1. Place potatoes in a saucepan of salted water, cover and bring to the boil. Reduce heat and simmer covered until cooked when tested.
2. Drain potatoes, peel and place in a large bowl, mash until smooth.
3. Add grated pumpkin and eggs to potatoes and mix thoroughly.
4. Add flour to mixture a little at a time and work with hands until dough consistency
5. Dust bench with extra flour, turn pumpkin mixture out and gently knead until smooth
6. Roll into large sausage shape and divide into 8 pieces.
7. Dust bench again and roll out each piece approx 1cm diameter and cut into 2cm lengths.
8. Roll pieces on gnocchi board (or gently press over the back of a fork)
9. Cook gnocchi in rapidly boiling salted water with a splash of olive oil.
10. Once gnocchi floats to the top of the saucepan, cook further one minute, drain and serve immediately with your favourite sauce. Enjoy!
Note: You could substitute sweet potato for the potato to make it even more healthy.
Recipe from the Gluten Free Italian Cookbook
Lemon Polenta Whoppie Pie recipe
Lemon Polenta Whoopie Pie Recipe

Makes 16 pies
For the whoopie pie shells:
125g butter, at room temperature
200g light brown sugar
2 eggs
450g gluten free plain flour
1 tsp salt
1½ tsp baking soda
250ml buttermilk
225g polenta, soaked in lemon juice (roughly 175g dry polenta and the juice of 4 lemons)

For the chocolate ganache:
300g dark chocolate, 70% cocoa, broken into small pieces
300ml double cream
Juice of 1 lemon
50g butter
½ tsp salt
To decorate (optional):
100g dark or milk chocolate
50g ground pistachios
1. Preheat your oven to 180˚C. Line two baking trays with baking paper or silicone mats.
2. Whisk together the butter and sugar. In a separate bowl, mix together the flour, salt and baking soda.
3. Add the flour mixture in three parts, alternating with the buttermilk.
4. Fold in the polenta. Fill a piping bag and pipe 5cm rounds (or however big you'd like your whoopie pies to be).
5. Bake for 10-15 minutes, or until the cakes spring back when touched. Allow to cool before filling.
6. While the whoopie pies are baking, heat the double cream to the point just before it boils over a medium heat. Remove from the heat and add the lemon juice, salt and butter. Stir until the butter melts completely
7. Add the hot double cream mixture to the chocolate pieces and whisk vigorously until the heat of the cream melts the chocolate, forming a thick ganache. Allow to cool.
8. Fill a piping bag with the chocolate ganache and pipe onto half the whoopie pie shells, cover with the other shells. To decorate, you can melt the milk chocolate over a hot water bath, spread a teaspoon full over the whoopie pies and top with ground pistachios.
Photography and recipe by Mowielicious
Recipe: Gluten Free Polenta cake
(Re-posted from Illawarra Gluten-Free)

For the lemon glaze:
For the lemon icing:

-Combine ground almonds, coconut, polenta, baking powder and lemon rind, and set aside. Using electric mixer beat butter and sugar until pale and fluffy.
-Add eggs one at a time, beating well after each. Fold in dry ingredients and lemon juice until just combined. Pour mix into greased and lined 9-inch/24-centimeter round cake tin (not springform) and bake at 325°F/160°C for one hour or until golden and just coming away from the side of the tin.
-Meanwhile, make the lemon glaze by heating the lemon juice and sugar gently, until the sugar is just dissolved.
-Remove from the oven and cool in the tin. Run a knife around the edge of the cake to loosen. Pour on lemon glaze while cake is still warm.
-Allow to cool completely in tin before turning on to a plate, as the cake falls apart easily while warm.
-Spread the lemon icing over the cake when cooled completely. (You can make the icing more like a loose glaze by slightly reducing the amount of icing sugar.)
Lemon Polenta Cake
For the cake:
- 130 g ground almonds (or almond flour)
- 130 g shredded coconut
- 130 g fine polenta (or yellow cornmeal)
- 1 t baking powder
- grated rind of 3 lemons
- 270 g soft butter
- 270 g caster sugar
- 4 eggs (55 g each)
- juice of 2 lemons
For the lemon glaze:
- juice of 2 lemons
- sugar to taste
For the lemon icing:
- 250 g icing sugar
- juice of ½ lemon, approximately

-Combine ground almonds, coconut, polenta, baking powder and lemon rind, and set aside. Using electric mixer beat butter and sugar until pale and fluffy.
-Add eggs one at a time, beating well after each. Fold in dry ingredients and lemon juice until just combined. Pour mix into greased and lined 9-inch/24-centimeter round cake tin (not springform) and bake at 325°F/160°C for one hour or until golden and just coming away from the side of the tin.
-Meanwhile, make the lemon glaze by heating the lemon juice and sugar gently, until the sugar is just dissolved.
-Remove from the oven and cool in the tin. Run a knife around the edge of the cake to loosen. Pour on lemon glaze while cake is still warm.
-Allow to cool completely in tin before turning on to a plate, as the cake falls apart easily while warm.
-Spread the lemon icing over the cake when cooled completely. (You can make the icing more like a loose glaze by slightly reducing the amount of icing sugar.)
Photos and recipe by A Whisk and a Spoon
Recipe: Lemon and Mint Sorbet
Continuing with the theme of gluten-free recipes featuring mint I just had to share this amazing lemon and mint sorbetrecipe fromAustralian Gourmet Traveller website newsletter. (Reposted from Illawarra Gluten Free)
.jpg)
Cooking Time Prep time 10 mins, cook 5 mins (plus freezing)


RECIPE Rodney Dunn PHOTOGRAPHY Jason Loucas STYLINGGeraldine Munoz
This tastes just as you would imagine: light and tangy, with the lingering flavour of mint.
.jpg)
Lemon and mint sorbet
Serves 4Cooking Time Prep time 10 mins, cook 5 mins (plus freezing)
| 220 gm | (1 cup) caster sugar |
| 2 tbsp | coarsely chopped mint leaves, plus extra leaves to serve |
| 1 | lemon, finely grated rind only, plus extra lemons to serve (optional) |
| ½ tbsp | liquid glucose |
| 75 ml | lemon juice |
| 1 | Combine sugar, mint, lemon rind and 125ml water in a saucepan, stir over low heat until sugar dissolves. Stir through glucose then lemon juice and strain (discard solids). Freeze in an ice-cream machine according to manufacturer’s instructions. Serve scoops of sorbet in hollowed-out lemons, if desired, and garnish with extra mint leaves. |
This recipe is from the September 2009 issue of Australian Gourmet Traveller.
Recipe: Gluten-free beer recipe

Filed under: Recipes, Gluten-free
How to Make Gluten Free Beer - Recipe | eHow.com:
By logan albertson, eHow Member
Good gluten free beer is one of the most sought after items by celiacs, and one of the biggest challenges for home brewers. Many have just come to except that good gluten free beer is just an urban legend, it's not easy to find but it does exist. This article gives a detailed recipe for making a gluten free belgian wit style beer, and believe it or not, it is delicious.
Be aware, that Gluten free brewing can get a little complex, so this article is intended for experienced brewers. However, my intent is not to exclude anyone who want this information. If you need clarification on terminology or techniques you may want to view my other brewing articles, and you can always send your questions to me and I will get back to you.
This recipe is my own variation, but I believe in giving credit where credit is due. The original recipe came from a brilliant Australian brewer named Andrew Lavery."
Read more at http://www.ehow.com/how_5909215_make-gluten-beer-recipe.html
Recipe: Dacquoise
Filed under:
Recipes: Gluten-Free
I was reading about Grabyourfork's food tour of Newtown, Sydneyand saw a reference to the Strawberry, rose and watermelon cake with a description of " almond dacquoise layered with thin slices of refreshing watermelon and garnished with ruby red strawberries." Yumm!
Dacquoise is a term I had recognised from a Gluten-Free cookbook and decided to refresh my memory with a Google search. I am so glad I did! What a perfect way to kick off my Spring Fling Lunch by the Sea event to celebrate the coming of Spring in a few weeks. I have been craving melons and berries and this Strawberry, rose and watermelon dacquoise sounds amazing!
Wikipedia defines dacquoise as: "a dessert cake made with layers of almond and hazelnut meringue and whipped cream or buttercream. It takes its name from the feminine form of the French word dacquois, meaning 'ofDax', a town in southwestern France. It is usually served chilled and accompanied by fruit. A particular form of the dacquoise is the marjolaine , which is long and rectangular and combines almond and hazelnut meringue layers with chocolate buttercream. The term dacquoise can also refer to the nut meringue layer itself."
I love the idea of a layer of watermelon and garnish of strawberries and the fact that it includes ground almonds and no wheat-based flour means that it is yet another Gluten-free recipe to add to my Cookbook in the making! I am looking at the layers and wondering how pastry chef Christopher Thé of Black Star Pastry managed to keep the layers separate when you consider how fragile the ingredients are. Definitely something to experiment with. I might add one layer of tempered dark chocolate above or below the watermelon for structural purposes. I can't wait to try this!
Martha Stewart has her own recipe for Dacquoise which looks like a good base to start from. I have substituted Gluten-Free plain flour for all purpose flour but I will share the recipe for dacquoise from the gluten-free cookbook when I track it down.
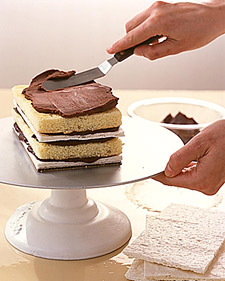
This recipe is used to make the dacquoise layer for theAlmond Dacquoise Cake. The layer of dacquoise and a layer of genoise are iced together with whipped ganache to form a neat loaf shape.
Ingredients:
* 1 tablespoon unsalted butter, softened
* 1/4 cup White Wings Gluten-free plain flour GF
* 1 cup finely ground blanched almonds
* 1/2 cup superfine sugar
* 3/4 cup confectioners' sugar
* 4 large egg whites
Method:
1. Heat oven to 200 degrees. Line a baking sheet with parchment paper. Brush with 1 tablespoon butter; coat with flour. Set aside.
2. Whisk together the almonds, 1/4 cup superfine sugar, and the confectioners' sugar; set aside. In the bowl of an electric mixer fitted with the whisk attachment, beat the egg whites until they form soft peaks. One tablespoon at a time, slowly add remaining 1/4 cup superfine sugar; continue to beat until mixture forms stiff peaks. Fold in the nut mixture. Spread the mixture onto the prepared baking sheet until it is 1/4 inch thick.
3. Bake the dacquoise 2 hours; then turn off the oven, and leave inside until completely cooled, about 30 minutes.
4. Using a serrated knife, carefully cut dacquoise into three 4-by-7-inch pieces. Wrap each piece individually in plastic wrap, and set aside. Save the leftover dacquoise for another use. The dacquoise can be made several days in advance and stored in an airtight container in a cool, dry place.
Read more at Marthastewartweddings.com: Dacquoise
Links:
Newtown food tour by Grab Your Fork
Recipe: Dacquoise (Meringue)
Wikipedia: Dacquoise
Subscribe to:
Posts (Atom)